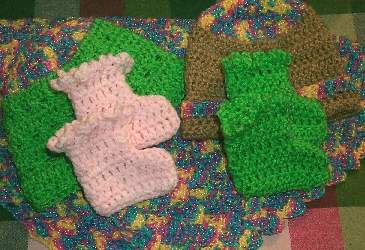
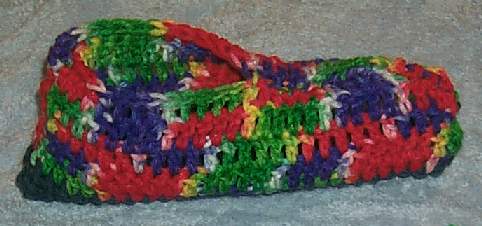
Measure your foot, the length and the width.
Make a rectangle, in single crochet of these measurements,
less one inch width and length.
When the rectangle's dcne, fold it lengthwise and slip-stitch
the 2 edges together.
That's the Top of the slipper, it's at the top of your foot.
ONly Slip stitch about 2/3 of the way up,
leaving room for the foot to fit into the slipper.
That's the foot part
At one end where there's the smallest opening,
baste the edge, making the toes part ,
it'll be rounded, pull tight and close off. That's the toes.
At the other end, where it's the largest opening, that's the heel,
Slip-Stitch the back seam before you add the leg part.
If it comes to a point, just tack it dcwn.
The leg part:
At the top, on the seam edge, slip-stitch and chain 3.
DC all the way around till you get to the chain 3.
*Slip-stitch the chain 3, crochet all the way around*
dcuble crochet all the way around again and again
till you get to within a couple of rows before the desired leg length.
When you get a couple of rows before your desired length,
dc a couple of decreases in each row.
Your very last stitch is to meet up with the chain 3
in the same row, slip stitch and close off.
Mine come to about 5 inches above my ankle, just like socks!
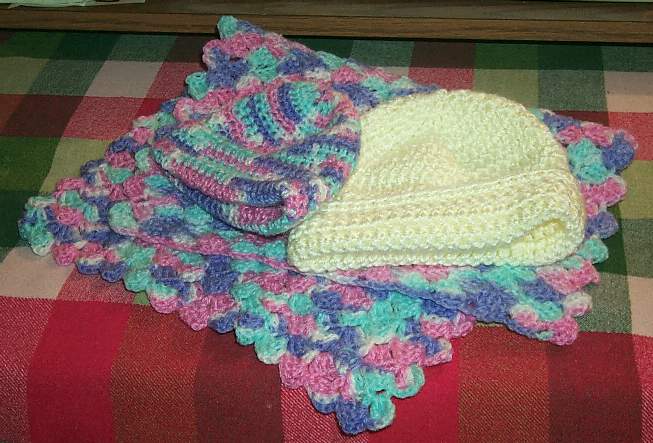
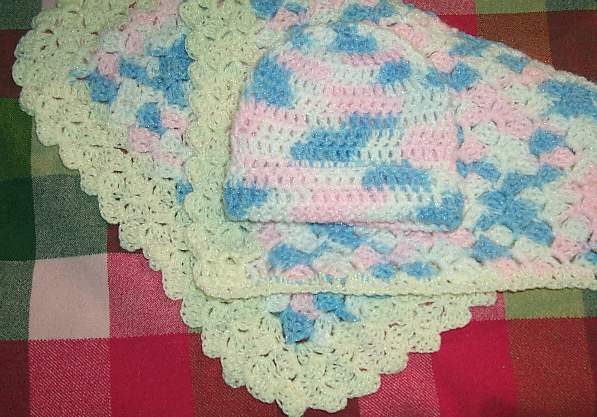
Wa Laa, All dcne! Glow Slippers
3 X Blankie
I ran into the Really Neat pattern for an afgan/blankie.
Make a chain of multiples of 3 plus 1.
After you dc the chain you dc all dcuble Crochets but in this order
2 1 3
First row:
Put your first DC on the 5th chain from the hook,
The next DC is the 6th chain from the hook
and the third DC in the 4th chain from the hook
In groups of 3
*you skip a space where a dcuble crochet would go,
dc a dcuble crochet in the second chain,
a dcuble crochet in the third chain,
Then go back to the chain that you skipped
and dc the third dcuble crochet in that chain.
It overlaps the 2 DCs that you just now did.*
YOu skip no stitches at all on the main chain,
and at the end of the row, in the chain that's left,
you dc a dcuble crochet,turn chain 3.
The next row should be exactly over the first row,
patterns all lined up.
Another way to dc this piece is to alternate rows
of dcuble crochet and 3x pattern.
dcn't forget to DC the ch3 in the previous row.
glor
Our Hugs and Stitches pal Liz M.
has sent us this pattern share and to enjoy
Cap with Ear Pieces and Ties
Thanx Liz
The pattern is called "Granny's Darling"
by Sandra Miller-Maxfield and was printed in the Sept/Oct 1995 issue of "Hooked on Crochet!"
SIZE: Instructions given fit 0-6 mos. Changes for 6-12 mos.
are made by changing hook sizes to achieve gauge given below.
STITCHES USED: Chain, single crochet, dcuble crochet, slip stitch.
See Crochet Basics (page 47) for stitch illustrations.
GAUGE: For 0-6 mos., with G hook, 4 sc = 1 " ; one
4-Sided Motif = 31/4" across.
For 6-12 mos., with H hook, 7 sc = 2";
one 4-Sided Motif = 31/2" across.
MATERIALS: Worsted-weight yarn - 2 oz. white,
1 oz. each green and pink; tapestry needle;
G or H crochet hook or size needed to obtain gauge.
SKILL LEVEL: ** Average
INSTRUCTIONS
4-SIDED MOTIF (make 5)
Rnd 1: With pink, ch 5, sl st in first ch to form ring,
ch 3, 2 dc in ring, ch 2, (3 dc in ring, ch 2) 3 times,
join with sl st in top of ch-3, fasten off (12 dc, 4 ch-2 sps).
NOTES: For beginning shell (beg shell),
(ch 3, 2 dc, ch 2, 3 dc) in same sp.
For shell, (3 dc, ch 2, 3 dc) in next st or ch sp.
Rnd 2: Join green with sl st in any ch sp, beg shell, ch 1,
(shell in next ch sp, ch 1) around, join, fasten off.
Rnd 3: Join white with sl st in any ch-2 sp, beg shell,
ch 1, 3 dc in next ch-1 sp, ch 1, (shell in ch
sp of next shell, ch 1, 3 dc in next ch-1 sp, ch 1)
around, join, fasten off.
5-SIDED MOTIF (Make 1)
Rnd 1: With pink, ch 5, sl st in first ch to form ring,
ch 3, 2 dc in ring,
ch 2, (3 dc in ring, ch 2) 4 times,
join with sl st in top of ch-3, fasten off
(15 dc, 5 ch-2 sps).
Rnds 2-3: Repeat same rnds of 4-Sided Motif.
3-SIDED MOTIF  (Make 3)
 Rnd 1: With pink, ch 5, sl st in
first ch to form ring, ch 3, 2 dc in
ring, ch 2, (3 dc in ring, ch 2) 2
times, join with sl st in top of
ch-3, fasten off (9 dc, 3 ch-2 sps).
Rnds 2-3: Repeat same rnds of 4-Sided Motif.
ASSEMBLY
1: Holding 4-Sided Motifs wrong sides together,
matching sts, sew together through back lps forming a ring.
2: Sew 5-Sided Motif to top of assembled
4-Sided Motifs in same manner.
3: Sew one 3-Sided Motif to bottom of one
4-Sided Motif through back Ips;
skip one 4 Sided Motif and sew other
3 Sided Motif to next 4-Sided Motif in same manner.
TRIM
Rnd 1: Working in back lps around bottom edge of
4-Sided Motifs and front lps of 3-Sided Motifs,
join white with sc in any
st, sc in each st around, join with sl st in first sc.
Rnd 2: Ch 1, sc in first st, ch 2,
(sc, ch 2) in each st around,
join, fasten off.
TIE (make 2)
With white, ch 55, sl st in 2nd ch from hook,
sl st in each ch across, fasten off.
Sew one Tie to tip of each 3 sided.

 Sign My Guestbook